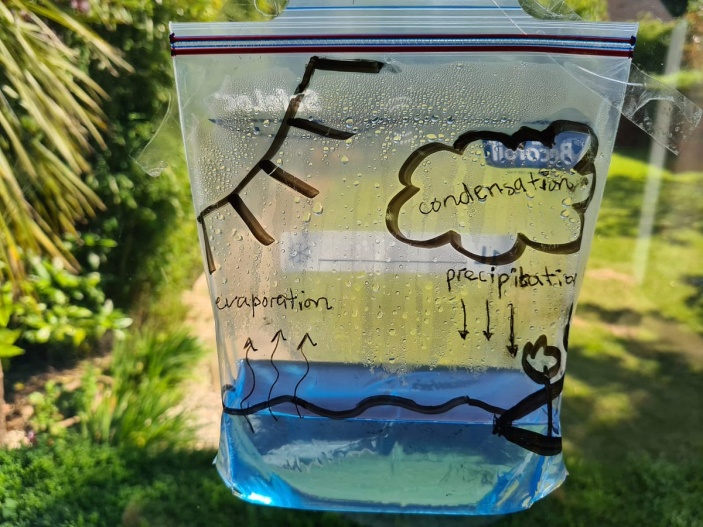
This activity is an easy way to demonstrate the basics of the water cycle: evaporation, condensation, and precipitation.
Materials Needed
- A gallon-size plastic bag
- Water
- Blue food coloring
- A permanent marker
- Packing tape
- A sunny window or a hairdryer
Directions
First, draw a model of the water cycle on the outside of your baggie. Then, add about 2 inches of water to the bag. Next, add a few drops of blue food coloring to the water.
Seal the bag. Make sure it is totally shut! (If you REALLY want to be sure, you can tape the top edge of the bag shut after it’s been sealed.) Tape the bag to a sunny window with a strip of packing tape along the top of the baggie.
If it is not a sunny day you can use a hairdryer on LOW to speed things along. Just be sure not to hold the hairdryer too close to the baggie and to keep it moving. Don’t melt the bag!
Explanation
The plastic bag prevents the evaporating water from escaping. It allows the three basic processes of the water cycle to take place in a small, observable space. As the sun (or hairdryer) warms the bag, some of the water turns into water vapor and evaporates. The water vapor rises above the water which increases the humidity level of the air in the bag. As the humidity increases, the air in the bag becomes saturated and some of the water vapor condenses back into drops of water. The drops of water collect along the sides of the bag and roll down the bag (precipitation).